This week, I rode the new Star Tours ride at Disneyland for the first time. While I’m a little nostalgic for the old ride, I loved the update. And it put me in the mood for some Star Wars crafts. First up: Star Wars fabric covered buttons!
One of my favorite things to do with 1” circular bottlecap images is to make fabric-covered buttons. They’re the perfect size for button-making, and the designs coordinate well with so many types of fabric. Today, I’m using my Star Wars images, which are available here, but you can use any images. Here’s what you’ll need:
One sheet of circular images
One sheet of iron-on transfer paper
A scrap of white- or light-colored fabric
A good iron
A pillowcase
A hard surface
5/8” or 7/8” buttons and a button-covering mold. I get mine from Cover Button City. Just a note: Choose your button size based on your designs. A one-inch image will run slightly off the sides of a 5/8” button. The same image will sit squarely in the center of a 7/8” button, with just a little extra fabric around the edges.
Cardstock
First, you’ll need to print out your images on the iron-on transfer paper. Your paper might be smaller or larger than standard 8.5x11” paper, so make sure to turn off the scaling options on your printer. This will ensure that your images are exactly 1.” Also, if your image contains text, you’ll want to flip the image in your photo-editing software since the finished button will show the reverse of your original image!
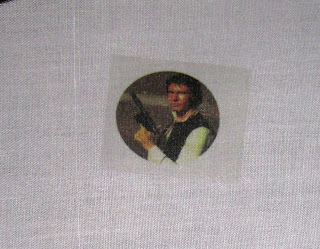
Next, choose the images you want and cut them out. I’ve decided to go old school Star Wars with my buttons, so I’ve cut out Luke, Leia, Darth Vader, and Han Solo. You don’t need to cut them out perfectly. Only the circular image will show on your final button.
Lay your pillowcase down on your hard surface. Top it with your fabric and, finally, with your images. The image side should be down. You'll want to do this on a table or countertop. Don’t use an ironing board.
Turn your iron to its hottest setting. Then, press it down on each image for 8-10 seconds. The image should adhere to the fabric.
Peel the paper backing off of each image. The image should have transferred onto the fabric.
Your buttons might have come with a button-covering template. If they didn’t, don’t worry. Take your cardstock and cut a 2” circle. Place it over your transfer, with the image squarely in the center. Trace and cut. (I don’t recommend using a sharpie for this, but it shows up better in pictures, so I’m using one here).
Place your image in the center of the button mold. Make sure the image is centered.
Place the button on top of your image, and push the excess fabric over the back of the button.
Cover it with the button back and push the entire thing together with the blue pusher.
Repeat these steps with the rest of your images. When you’re done, you should have a handful of buttons that are perfect for dressing up a shirt or a jacket. I'm putting mine on a dress for my daughter. It should look great the next time I put her hair in Princess Leia buns.


No comments:
Post a Comment